Top of the World
Elevation: 2,080m
Welcome to the Sun Peaks Bike Park! Whether you’re new to lift-access riding or to the sport of mountain biking itself, having the right type of bike and protective equipment will go a long way to making sure you have a fun day on the trails. Check out our guide below to help you get started.
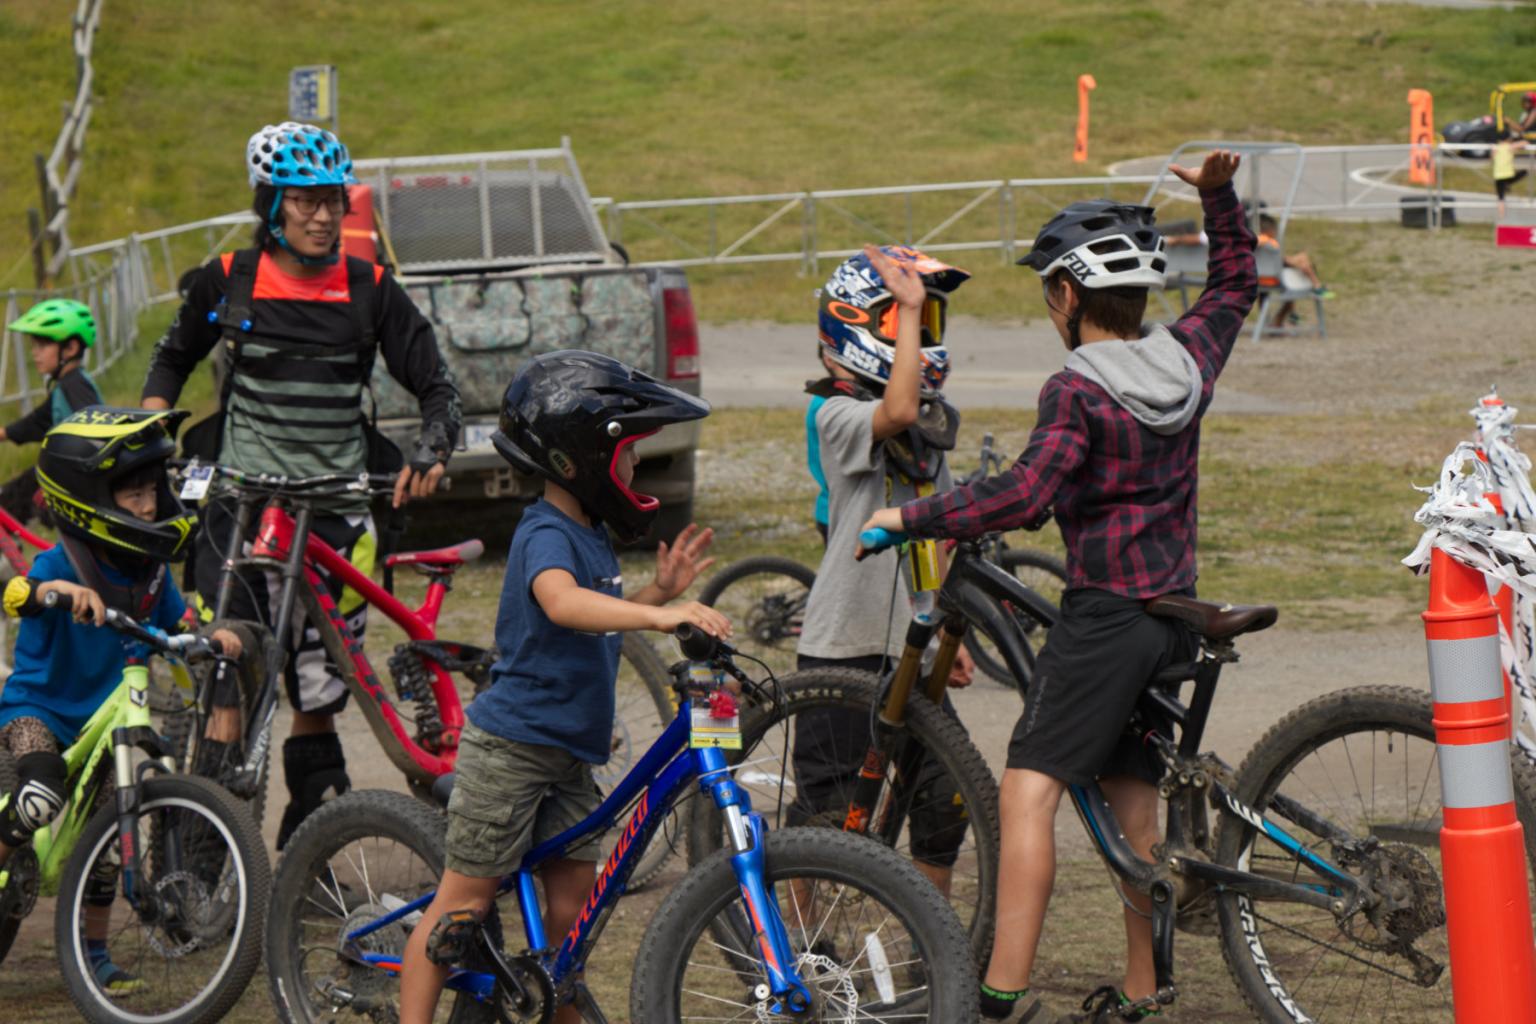
Children five (5) and older have full access to the Bike Park. Children four (4) and under may access the Progression Park only. Children 12 years and under must be accompanied by a parent/legal guardian (19 years or older) when riding in the Bike Park. The parent or guardian must sign the Bike Park waiver for the child.
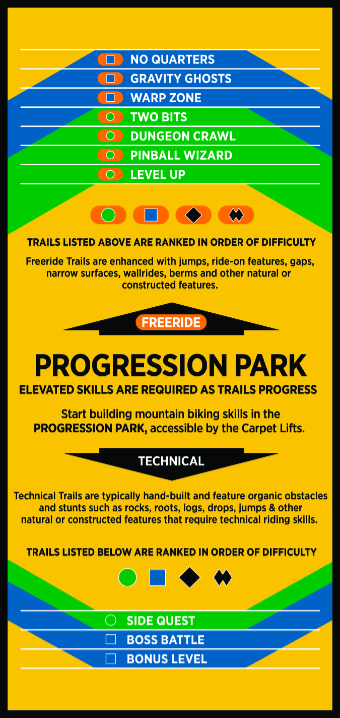
The Progression Park is the perfect place for kids and beginners of all ages to build core mountain biking skills. This skills zone features trails that are shorter and easier than those in the main Sun Peaks Bike Park, helping riders build confidence with the basics. It also includes a mini jump line, drop section and pump track. The Progression Park is accessed via the Bike Park Carpets.
Progression Park 101: A Guide (PDF)
There is no minimum age for the Progression Park. However, children must be able to load, stand unassisted and dismount from the Bike Park Carpets on their own to access the area.
Children under eight years of age must be accompanied by a parent or guardian while in the Progression Park.
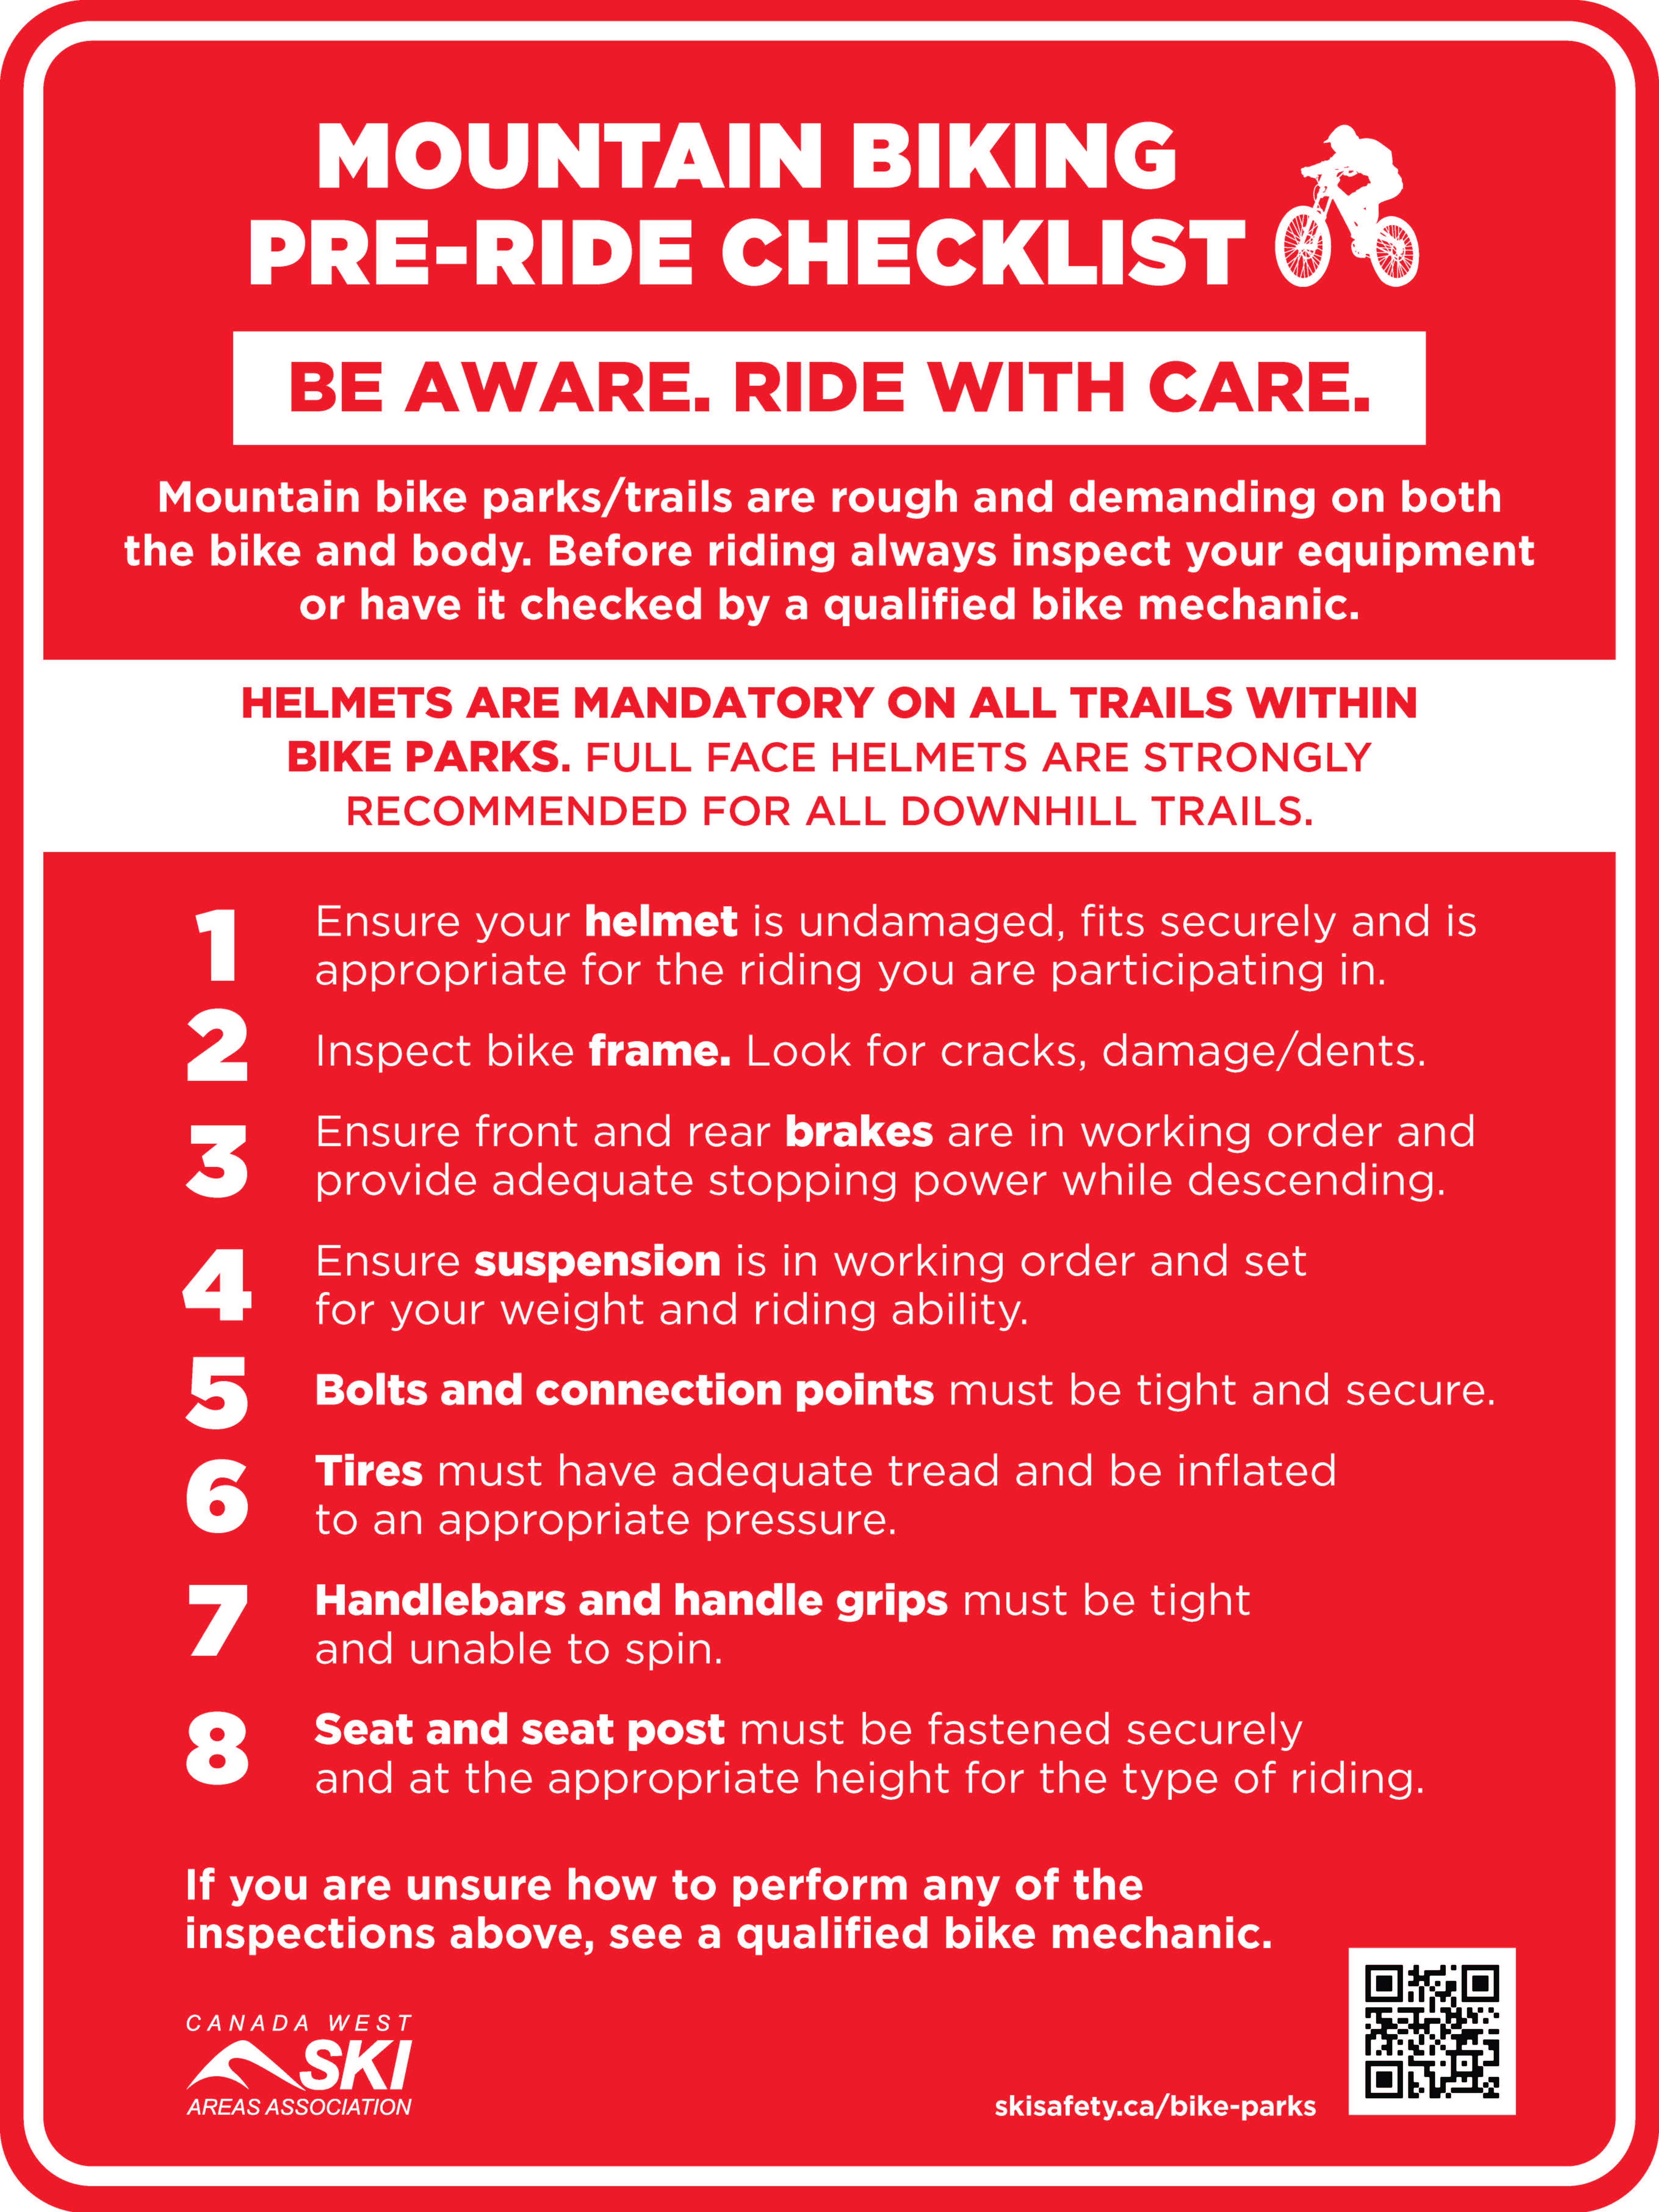
Mountain Bike Parks/Trails are rough and demanding on both the bike and body. Before riding, always inspect your equipment or have it checked by a qualified bike mechanic.
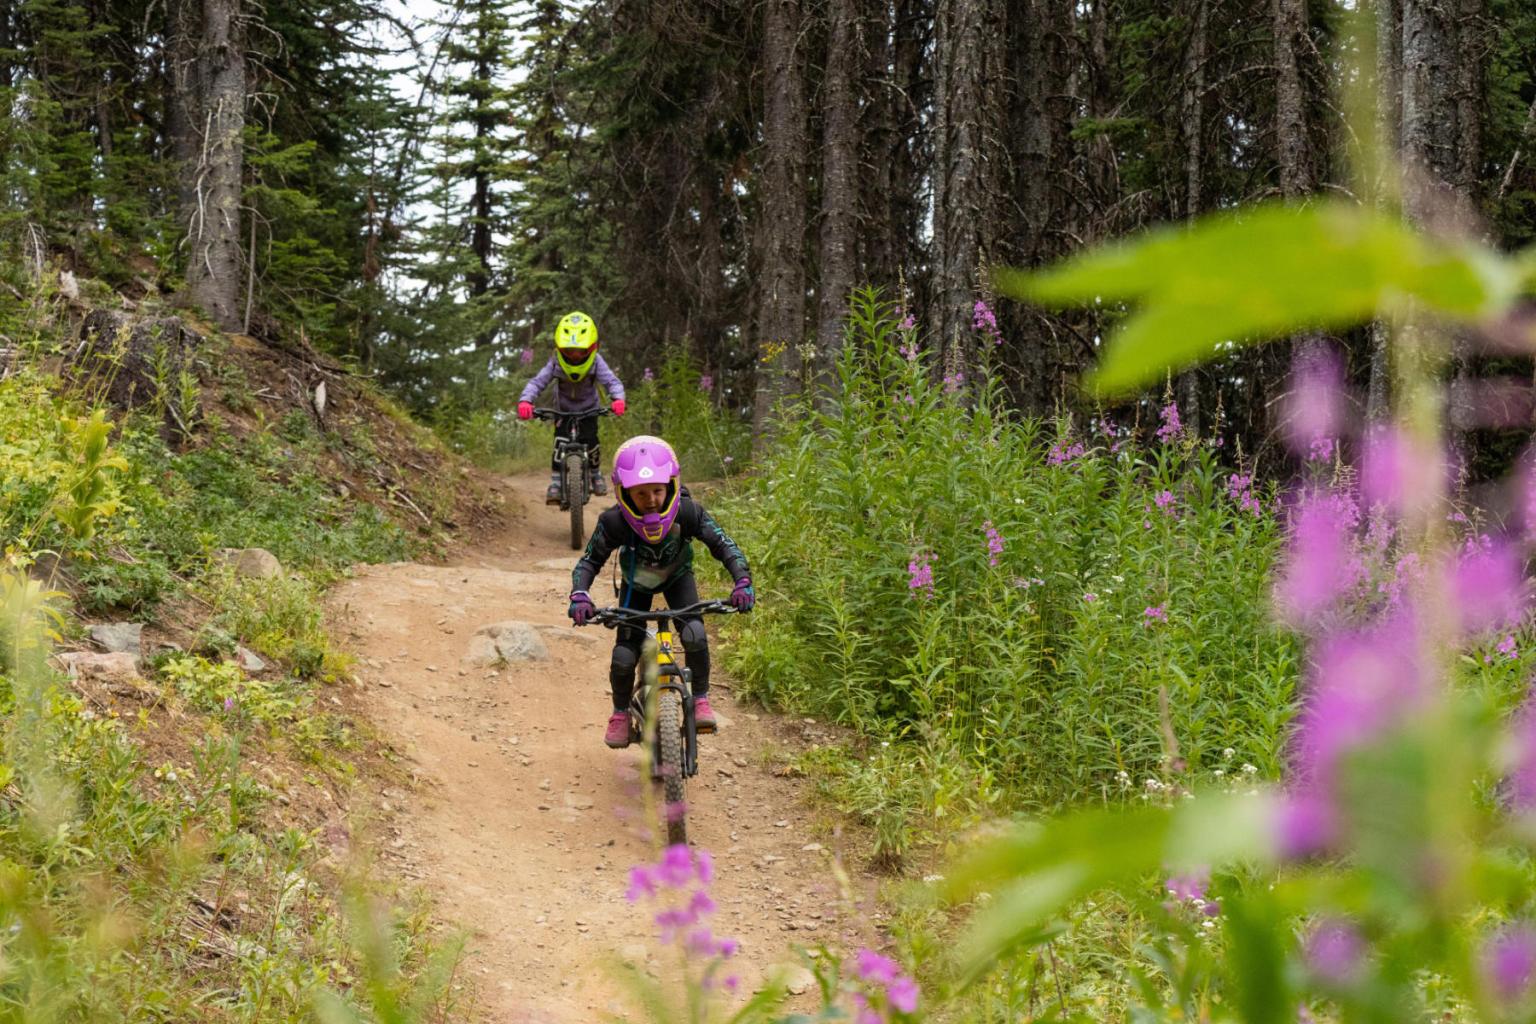
Helmets are mandatory on all trails within bike parks. Full face helmets are strongly recommended for all downhill trails.
If you are unsure how to perform any of the inspections above, see a qualified bike mechanic.
Smoking of all types, including tobacco, vaping and cannabis (both recreational and prescribed), is not permitted anywhere on Sun Peaks Resort property, including lift lines, chairlifts and carpets, ski runs, Nordic trails, bike and hike trails, Sunburst Lodge and all other on-mountain areas
Learn more about our Smoke-Free Initiative.
Out of safety concerns for guests, employees, and resort property, as well as concerns for individual privacy, Sun Peaks Resort prohibits the operation or use of unmanned aerial vehicles/drones by the general public, including recreational users and hobbyists.
All routes within the Bike Park are designated by colour-coded trail markers at the start of each descent. Trails with an orange oval indicate Freeride trails with man-made features and may require jumping skills, trails without the orange oval indicate Technical trails. Work your way up to more advanced trails and features based on your progression, skill and comfort level.
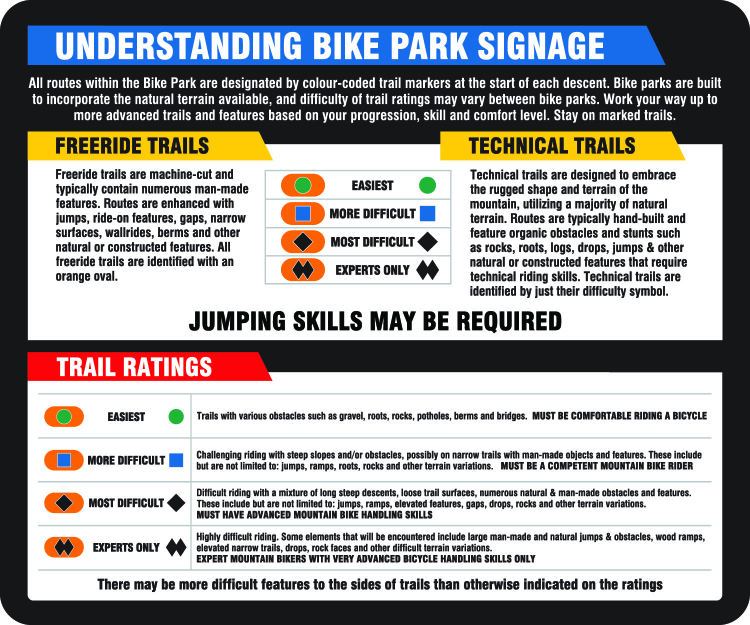
Our Trail Progression Chart ranks all of the trails in the Bike Park by difficulty level, helping you to decide which trail you should attempt next. Keep in mind that, as a general rule, most riders will find trails marked as Freeride easier than trails of the equivalent difficulty designated as Technical.
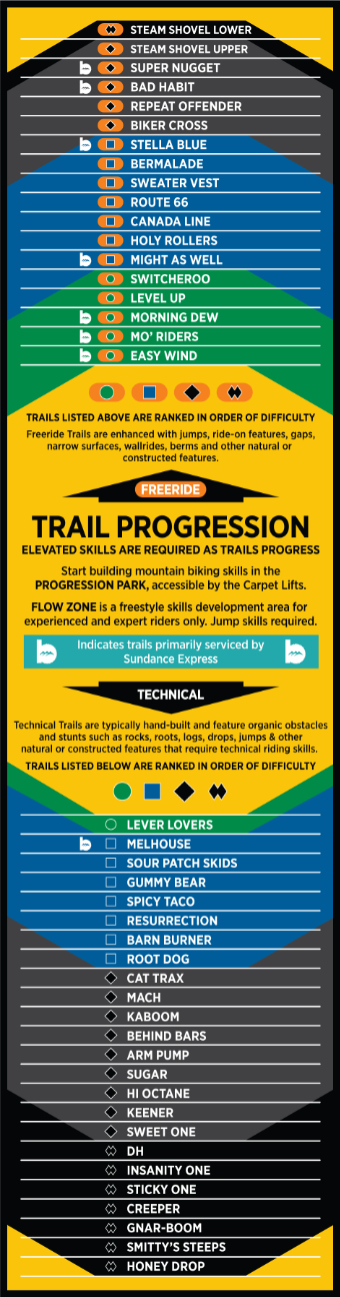

The trails in our Bike Park are designed to help you progress your riding in a fun and safe manner. As you gain more riding experience and confidence on easier trails, you can start to work your way up to more difficult trails.
The Sun Peaks Bike Park consists of a number of downhill specific trails, as well as two lift-access cross country options. Trails are accessed via the Sunburst Express and Sundance Express chairlifts and the Bike Park carpets.
The Progression Park, accessed via the Bike Park carpets is the easiest place to ride in the Bike Park, so we recommend that new riders start there to get a feel for downhill biking. Once you are feeling comfortable on all of the trails in the Progression Park, the next step is our Beginner progression trail Easy Wind, accessed via the Sundance Express chairlift in the main Sun Peaks Bike Park. After getting the hang of Easy Wind we recommend moving onto Morning Dew to Level Up and then onward from there. Click here to view the Progression Park Map and Progression Chart.
Our Trail Progression Chart ranks all of the trails in the Bike Park by difficulty level, helping you to decide which trail you should attempt next. Keep in mind that, as a general rule, most riders will find trails marked as Freeride easier than trails of the equivalent difficulty designated as Technical. For more information about the difference between Freeride and Technical trails, as well as how to understand Bike Park signage, click here.
There are two styles of lifts in the Bike Park, Tray and Conveyor (carpet) style. If you are unfamiliar with loading your bike please ask our lift attendants for assistance.
Sunburst and Sundance Express Chairlifts - Tray Style
For more information visit our Summer Chairlift Safety page.
Bike Park Carpets - Conveyor Style (carpets)
For more information visit our Summer Chairlift Safety page.
Riding the Sun Peaks Bike Park requires a different type of mountain bike than you might be familiar with. Mountain bikes designed for downhill riding with full suspension, the right geometry, and suitable components will make your day in the park safe and fun.
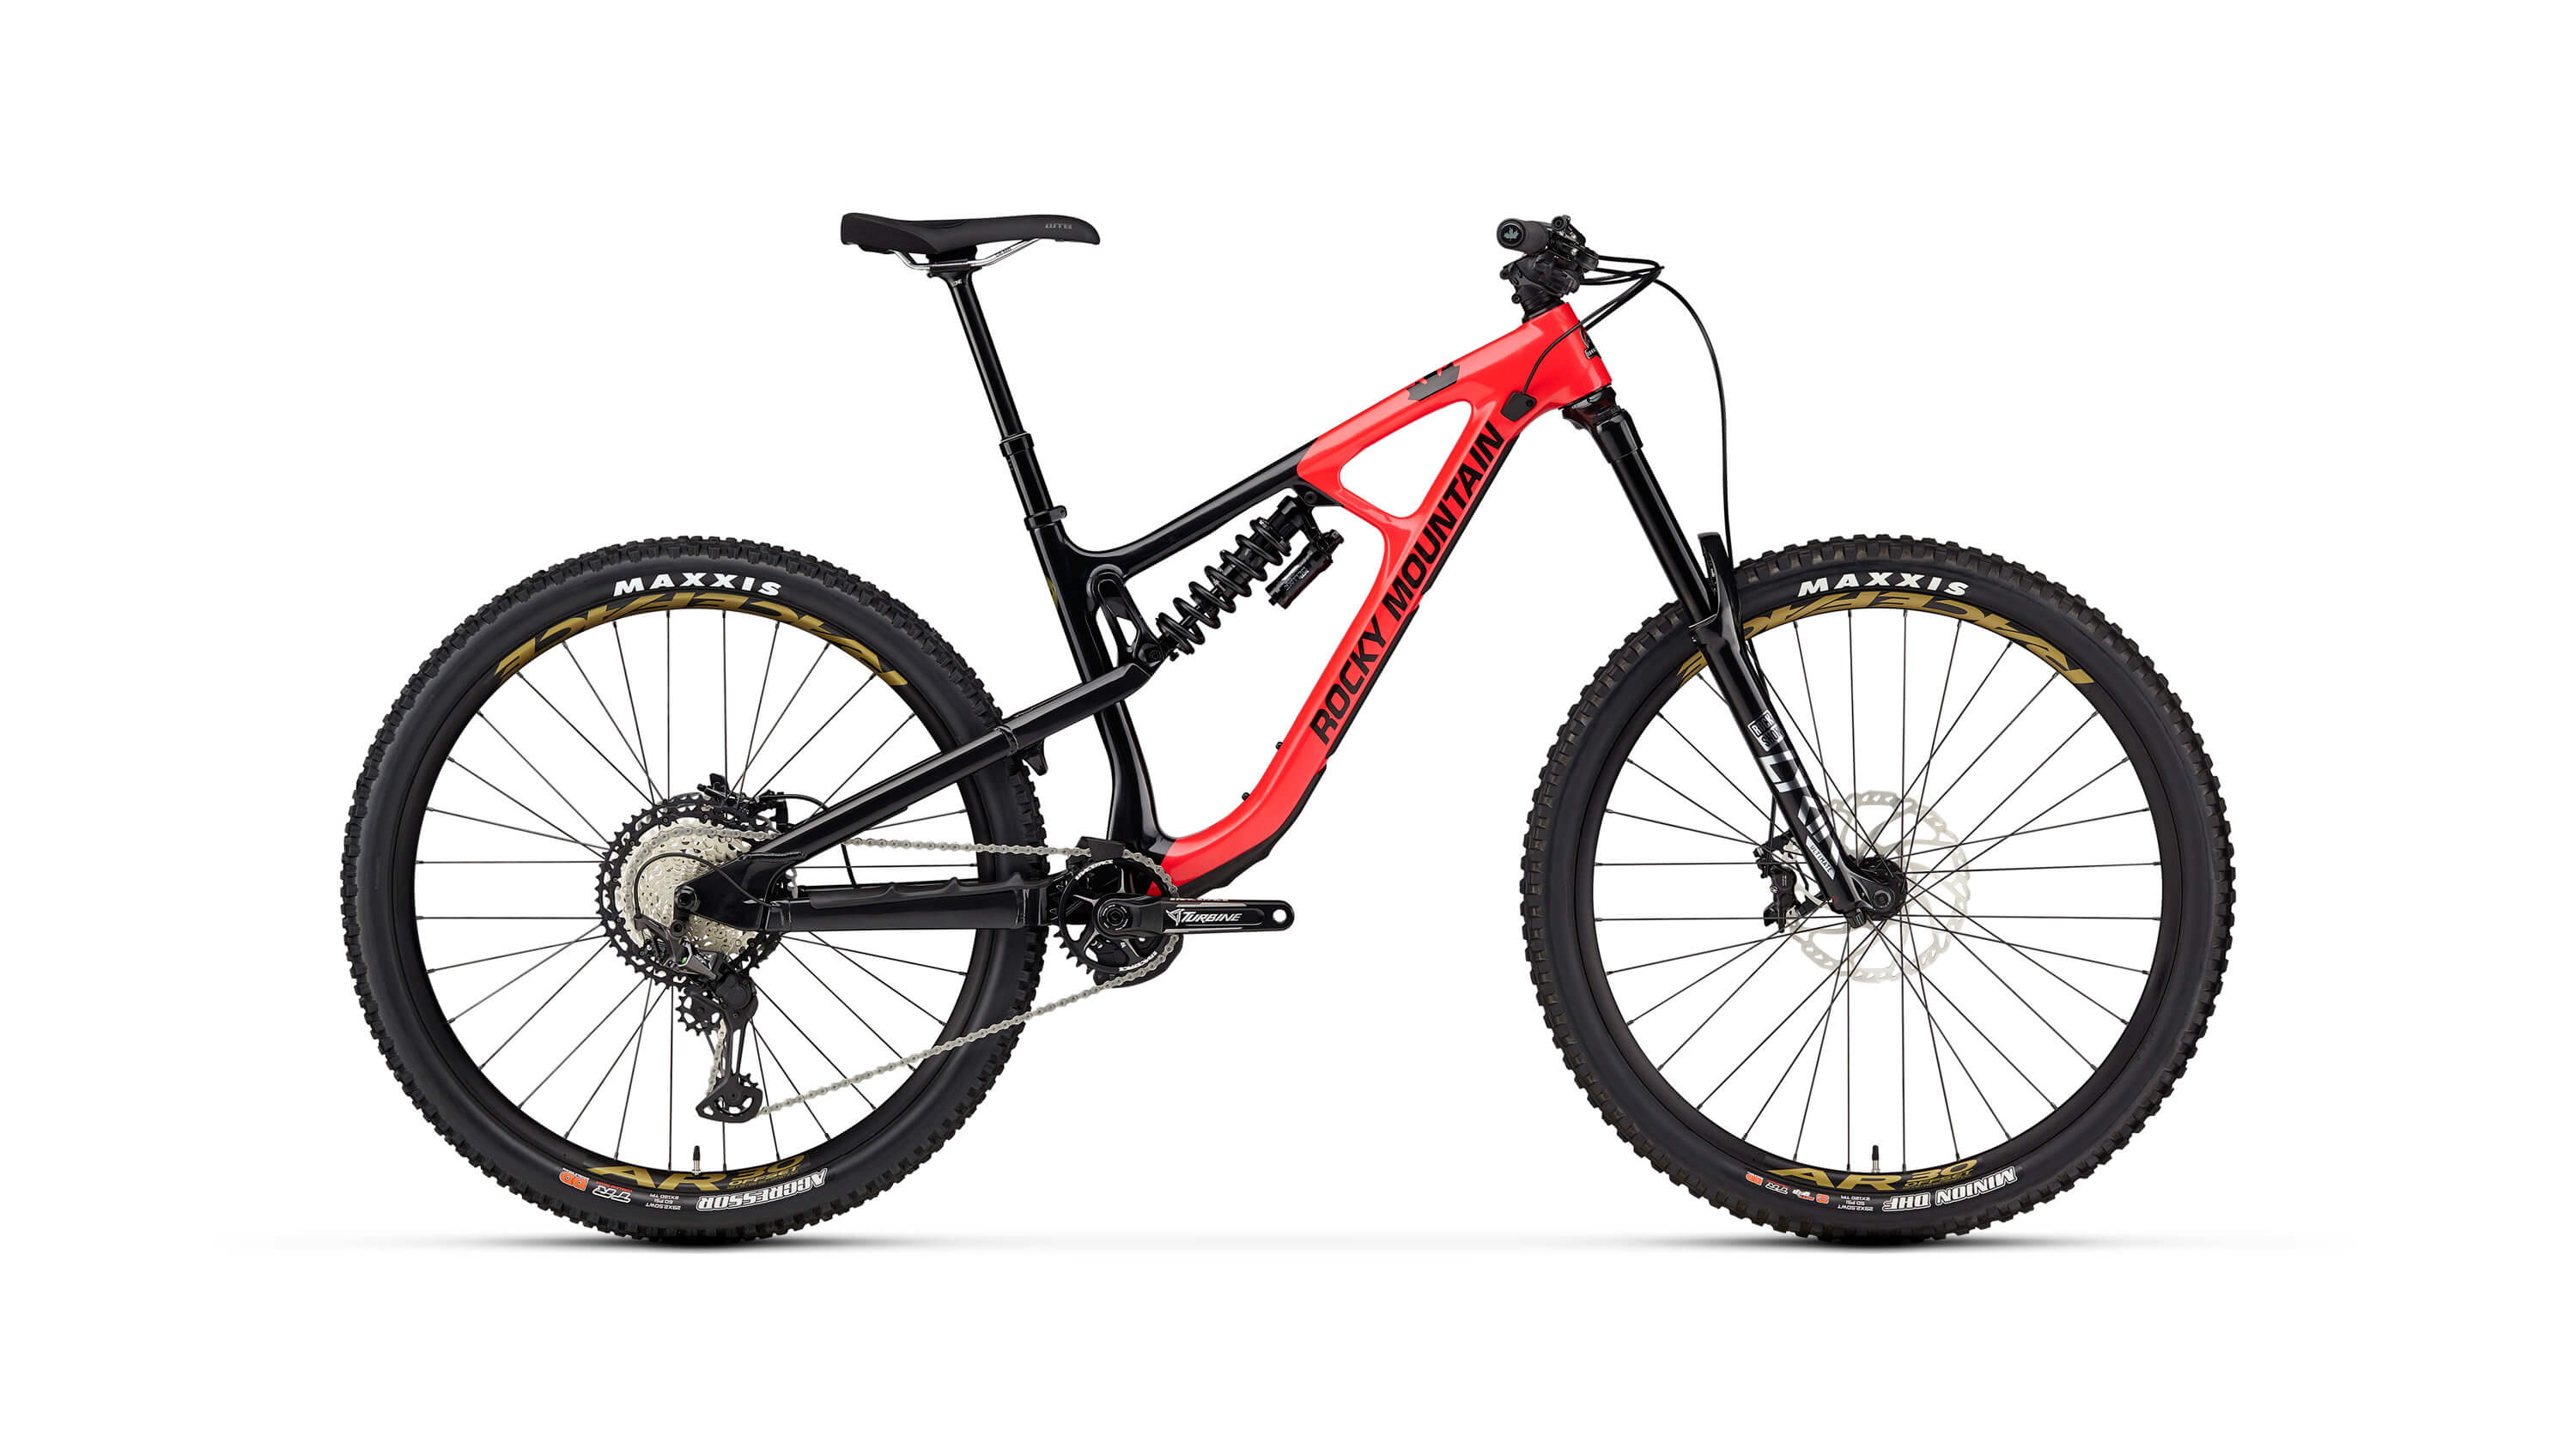
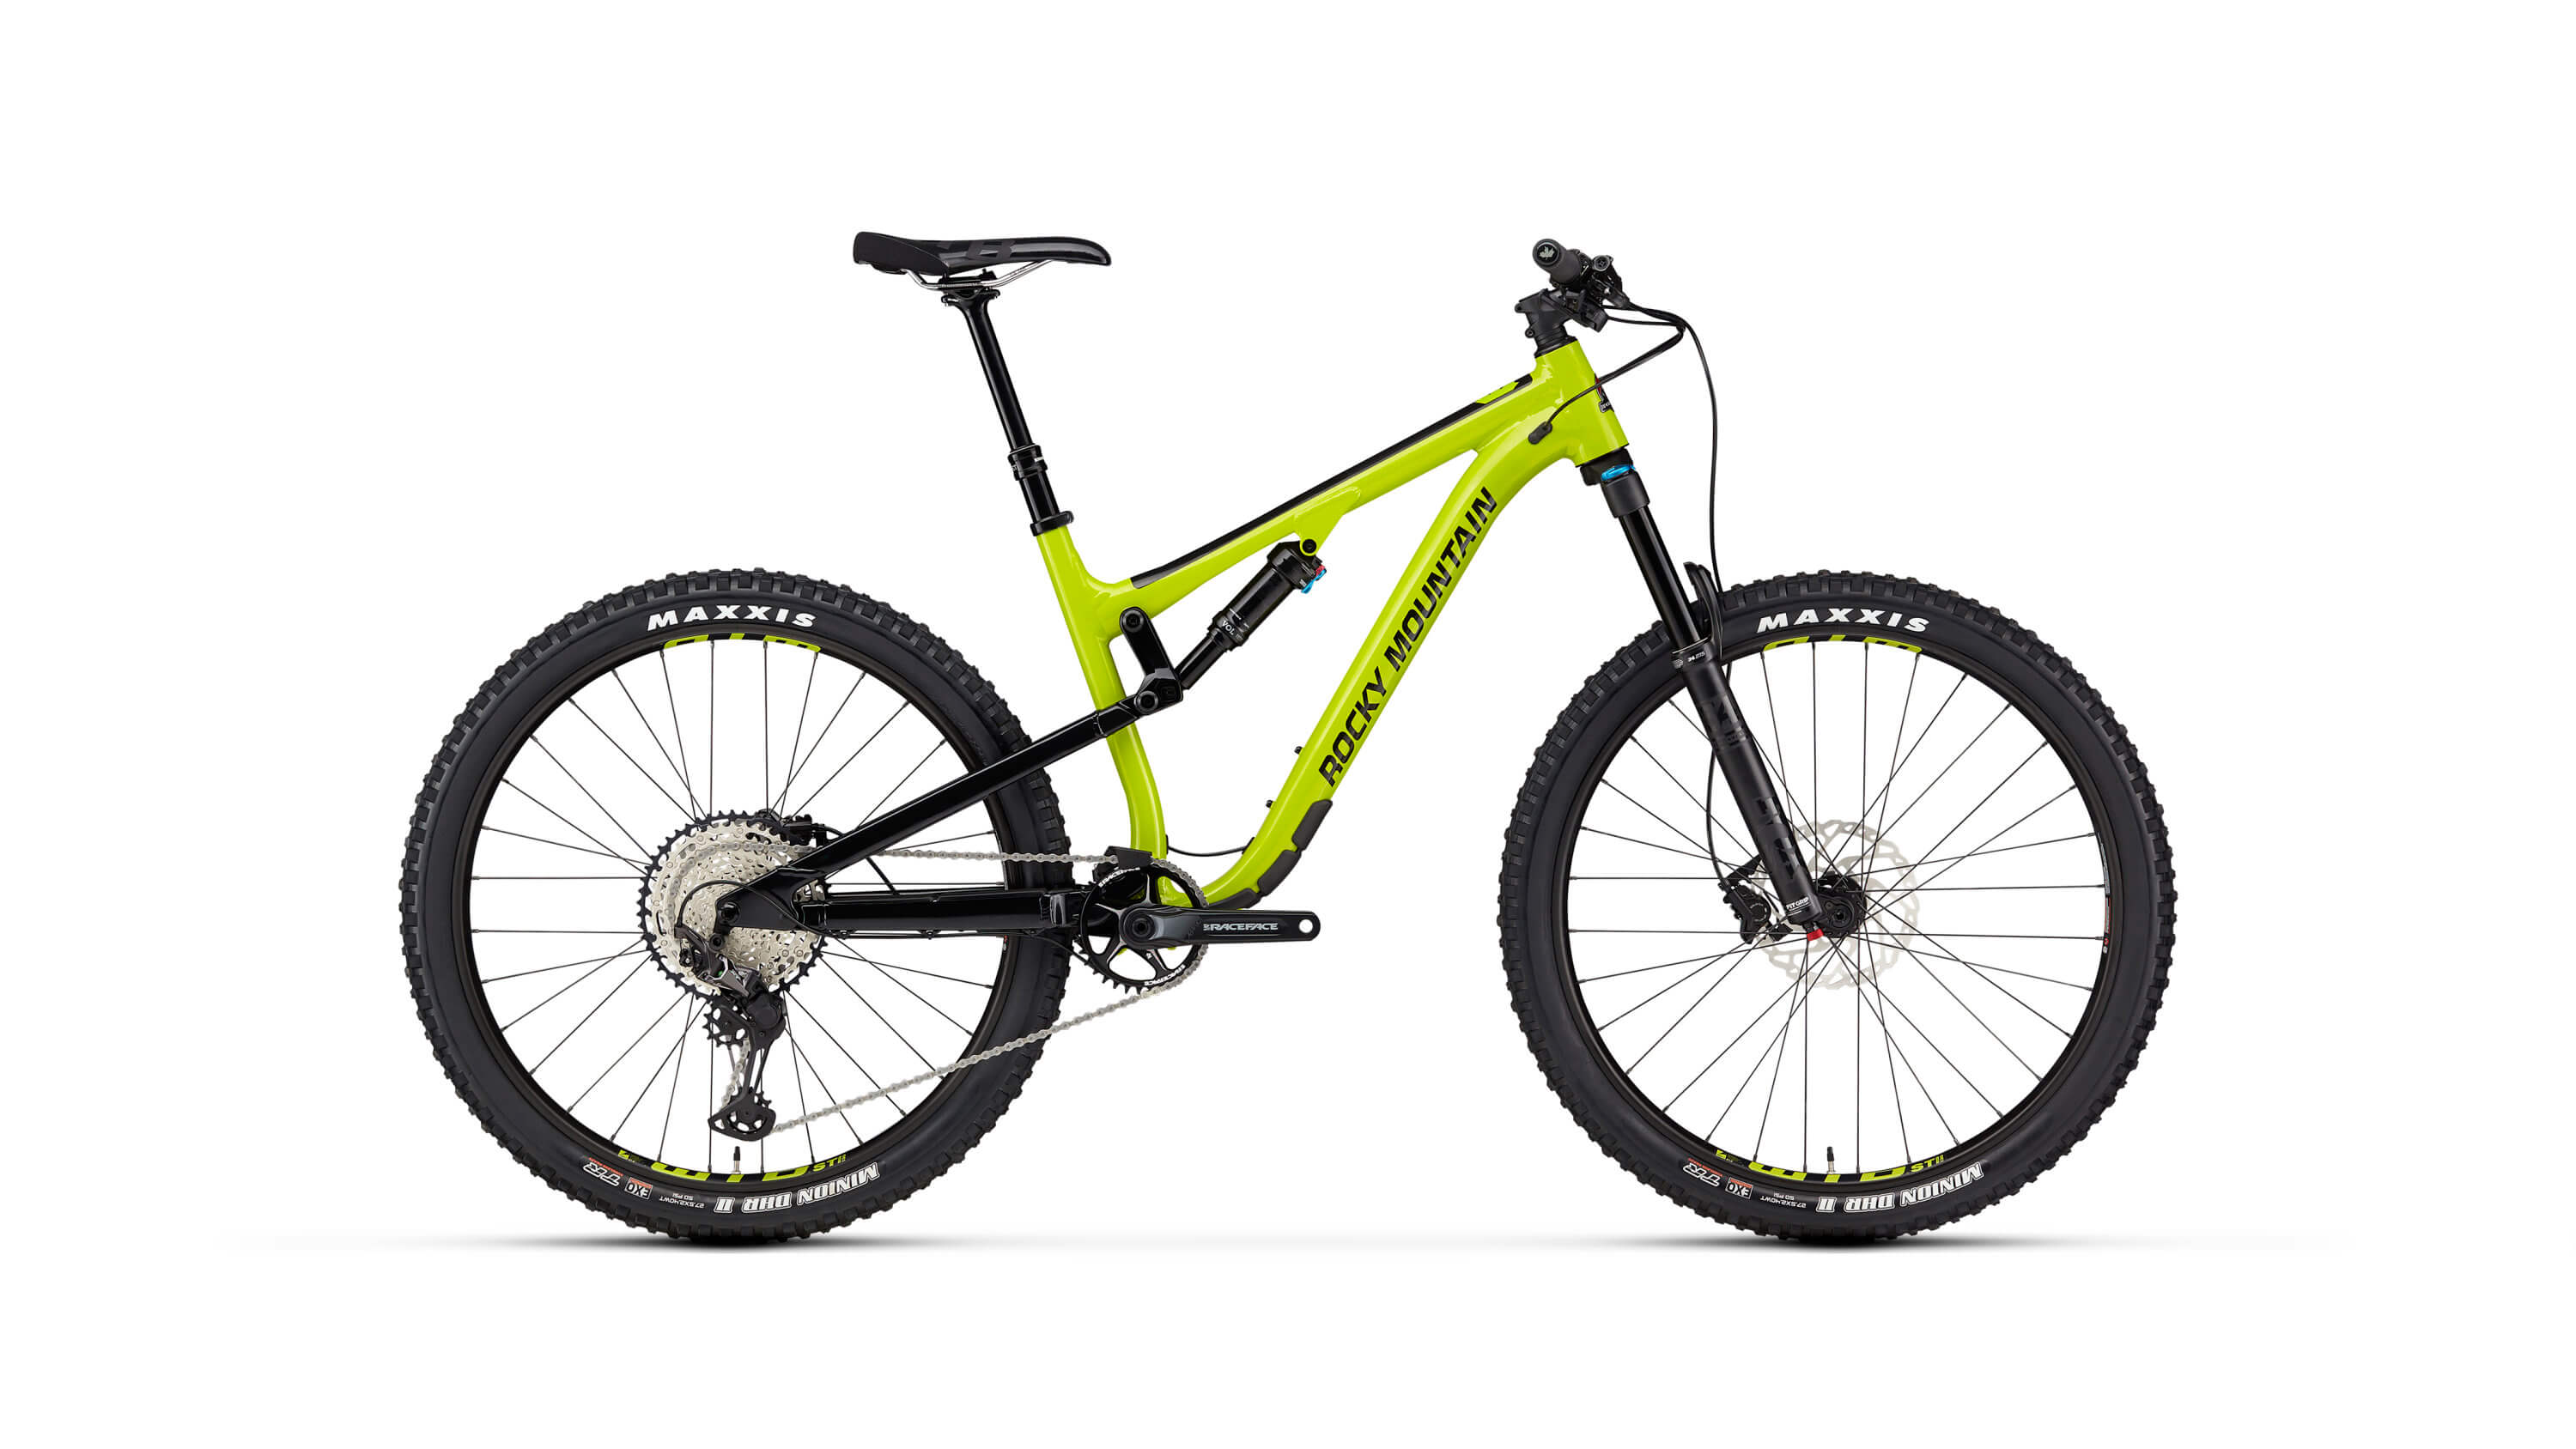
Downhill/enduro bikes are intended for all levels of rider who want to enjoy the most out of the Bike Park. These full suspension bikes have powerful brakes and heavy-duty components to handle everything that the Bike Park’s technical and freeride terrain can throw at them. We recommend this type of bike for any level of rider in the bike park.
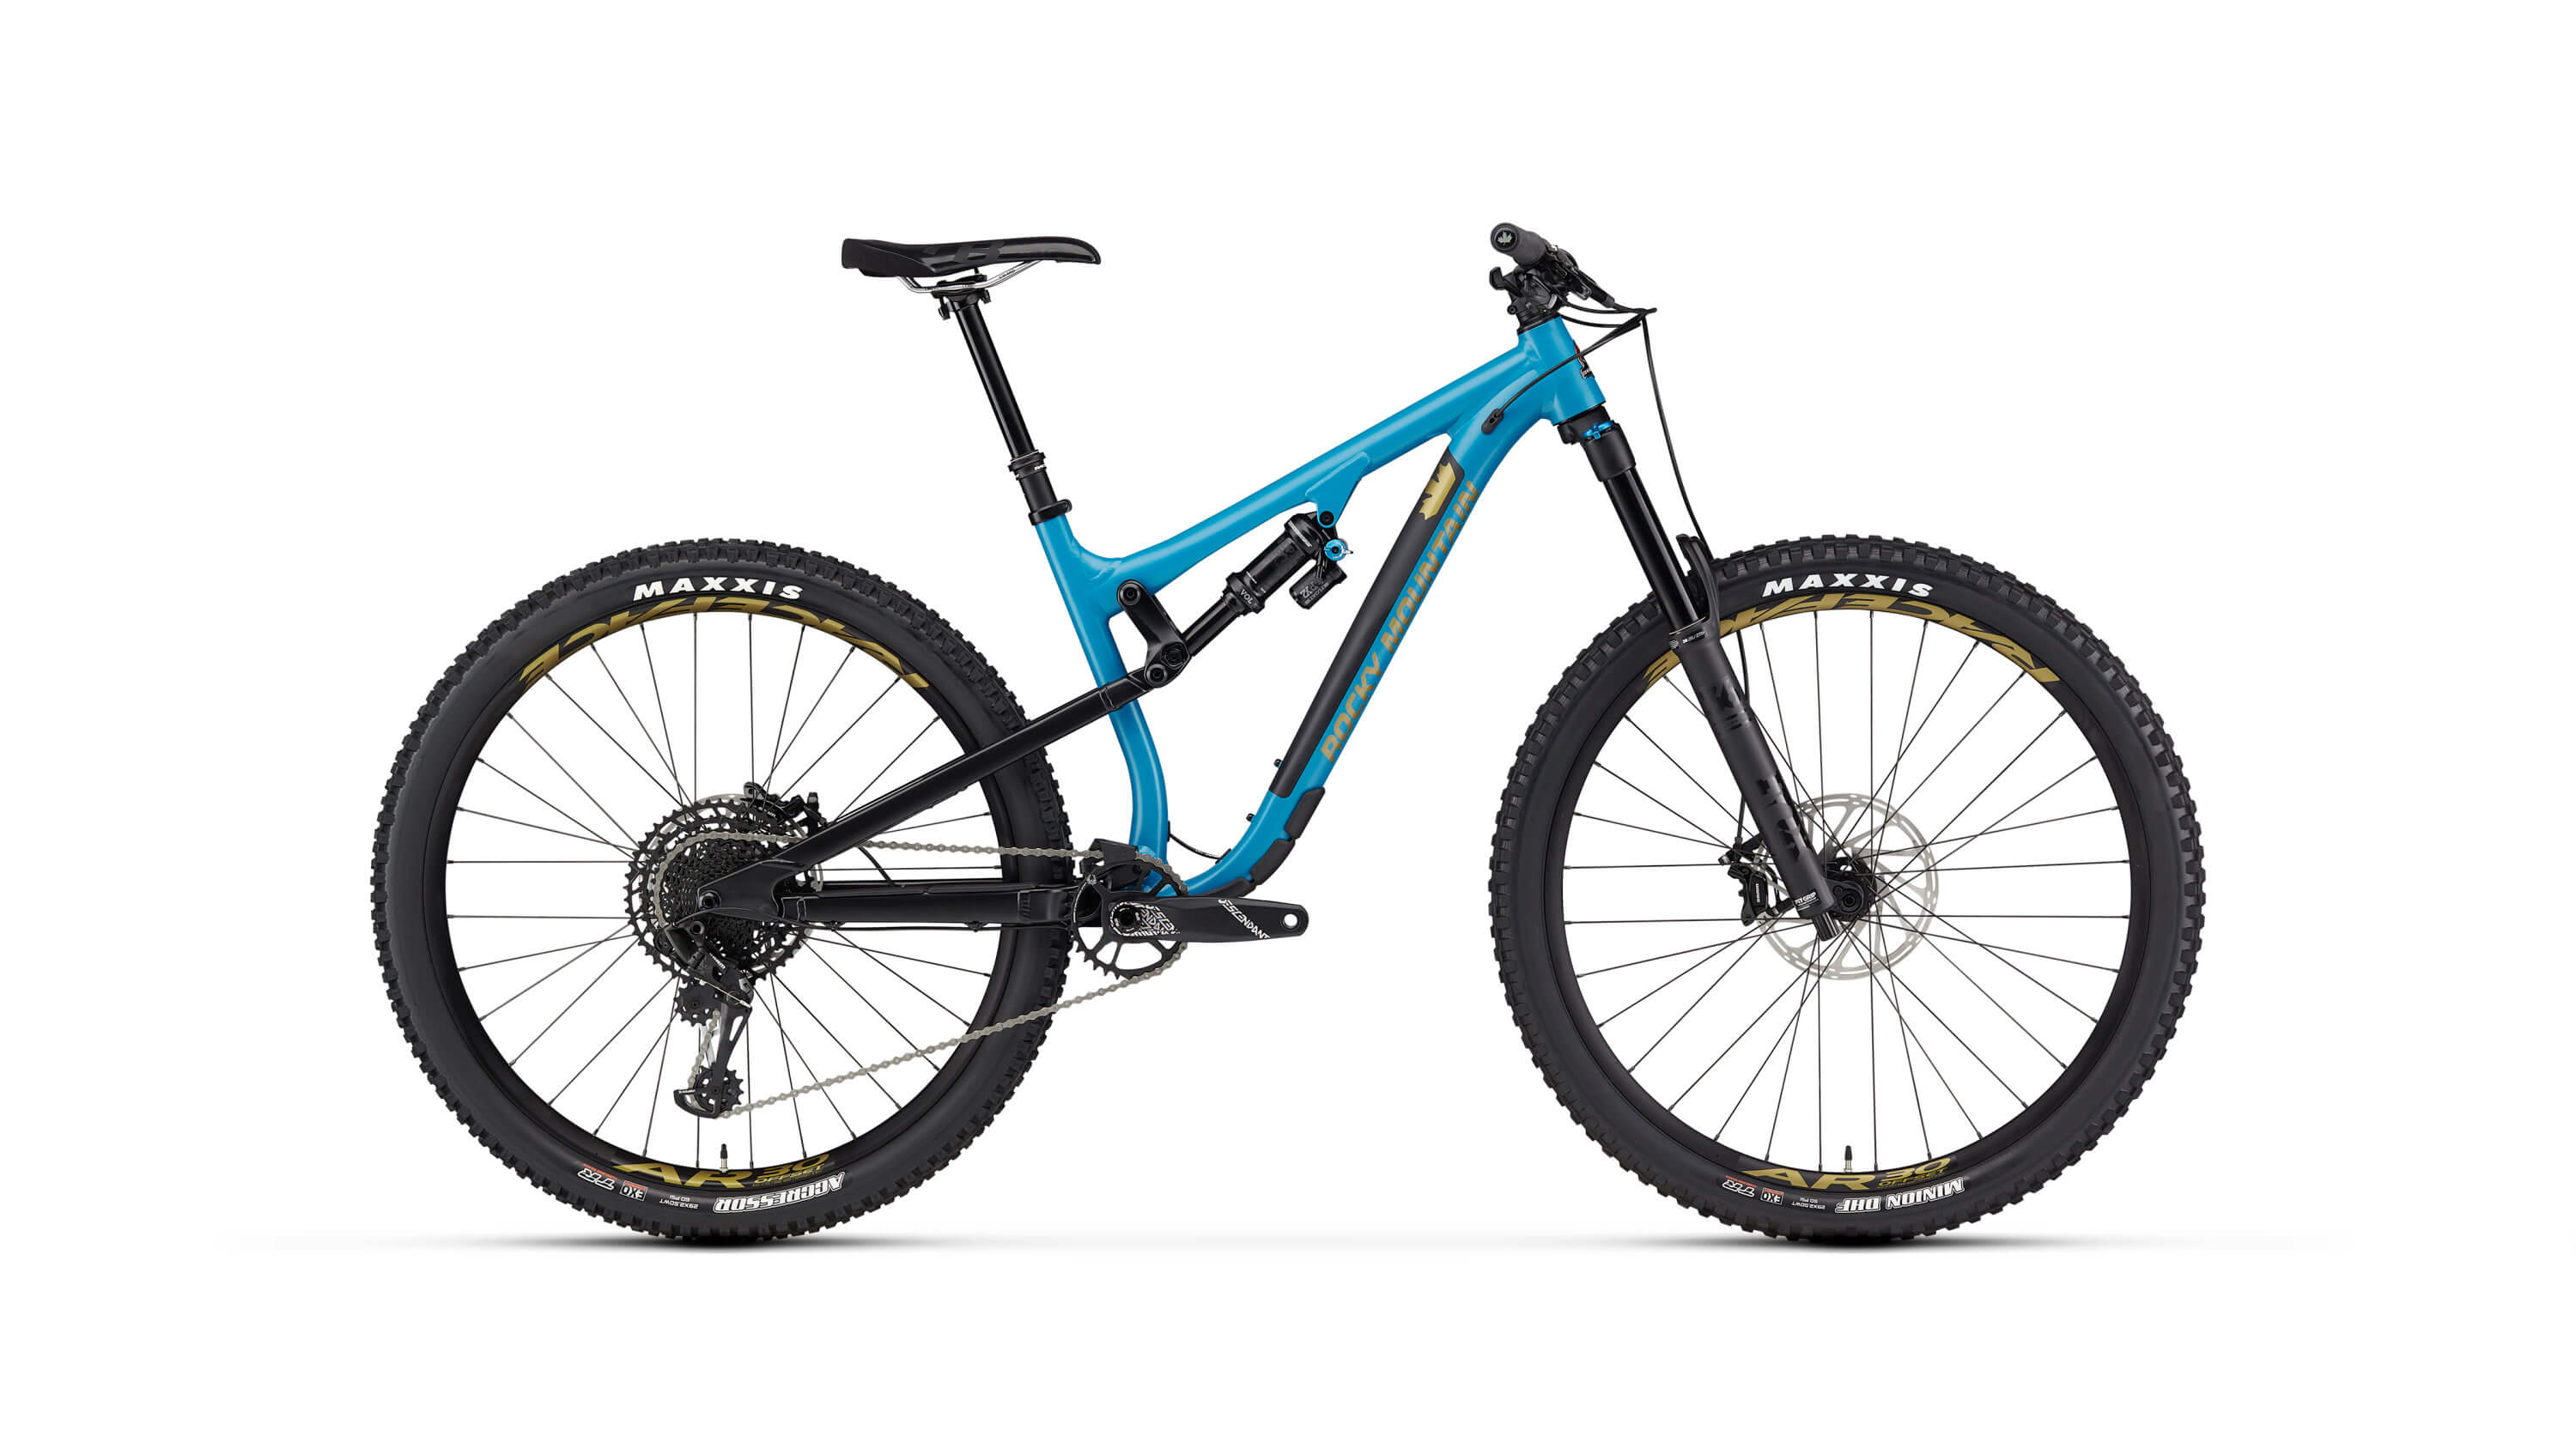
All-mountain bikes, which can also be known as trail bikes, combine dual suspension and powerful brakes for big descents with lighter components and a more upright design, meaning they can also be pedaled uphill. At a minimum, Bike Park riders should have an all-mountain, full-suspension bike. These bikes are best suited for beginner and intermediate terrain only. We do not recommend using this type of bike on Advanced (black diamond) or Experts Only (double black diamond) trails.
Not recommended for the Bike Park. Cross country bikes have less suspension than all-mountain and downhill mountain bikes, making them ideal for pedaling long distances. Less powerful brakes and lighter weight components make them less suitable for downhill focused riding however.
Bikes designed for cross country riding can be either full suspension or hardtails. Dual suspension cross-country bikes are suitable for the Progression Park, as well as the lift-access cross country trails and the Level Up progression trail in the Sun Peaks Bike Park. A fantastic trail combination for experienced cross country riders is to connect the alpine XC trail Altitude to Level Up.
Hardtail cross country bikes with front only suspension are not recommended in the Bike Park, but will help you enjoy the Valley XC Network.
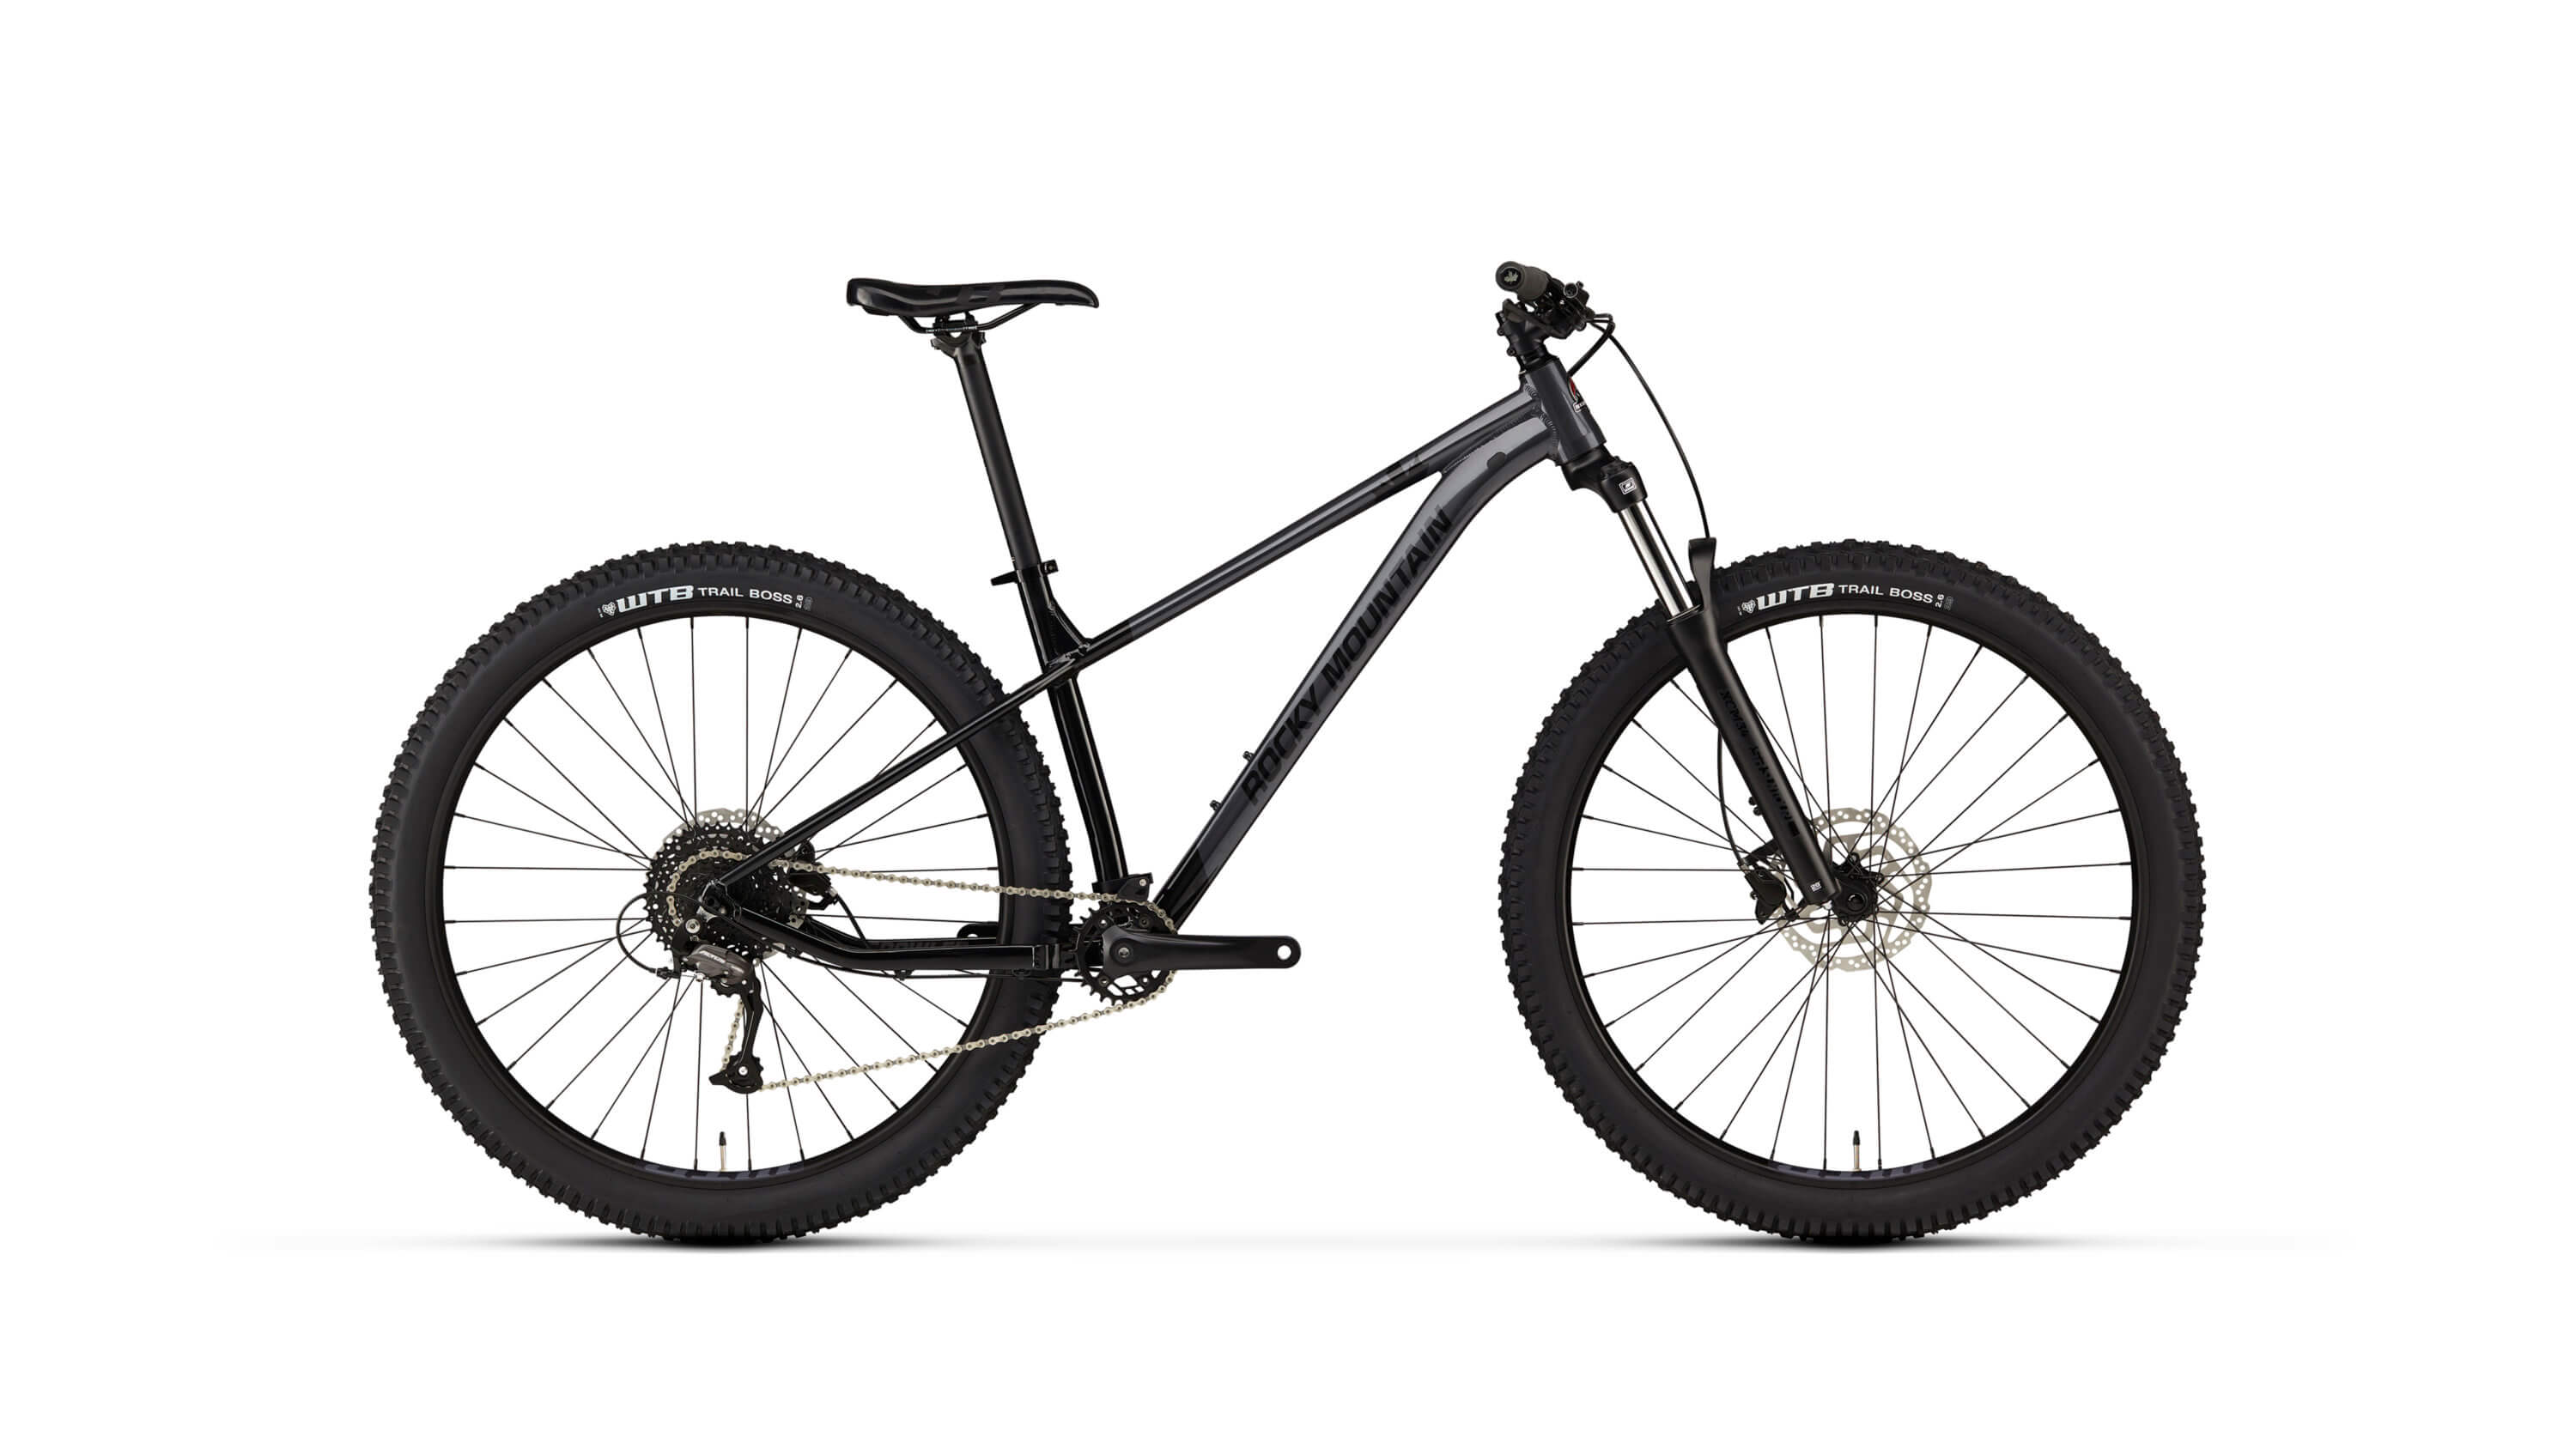
Not recommended for the Bike Park. Many mountain bikes designed for beginners are hardtails, which means that they have no rear suspension. While some newer hardtails are built with the right components and geometry to be used in difficult terrain by experienced riders, the majority of hardtails are designed for cross country use and are not recommended in the Bike Park.
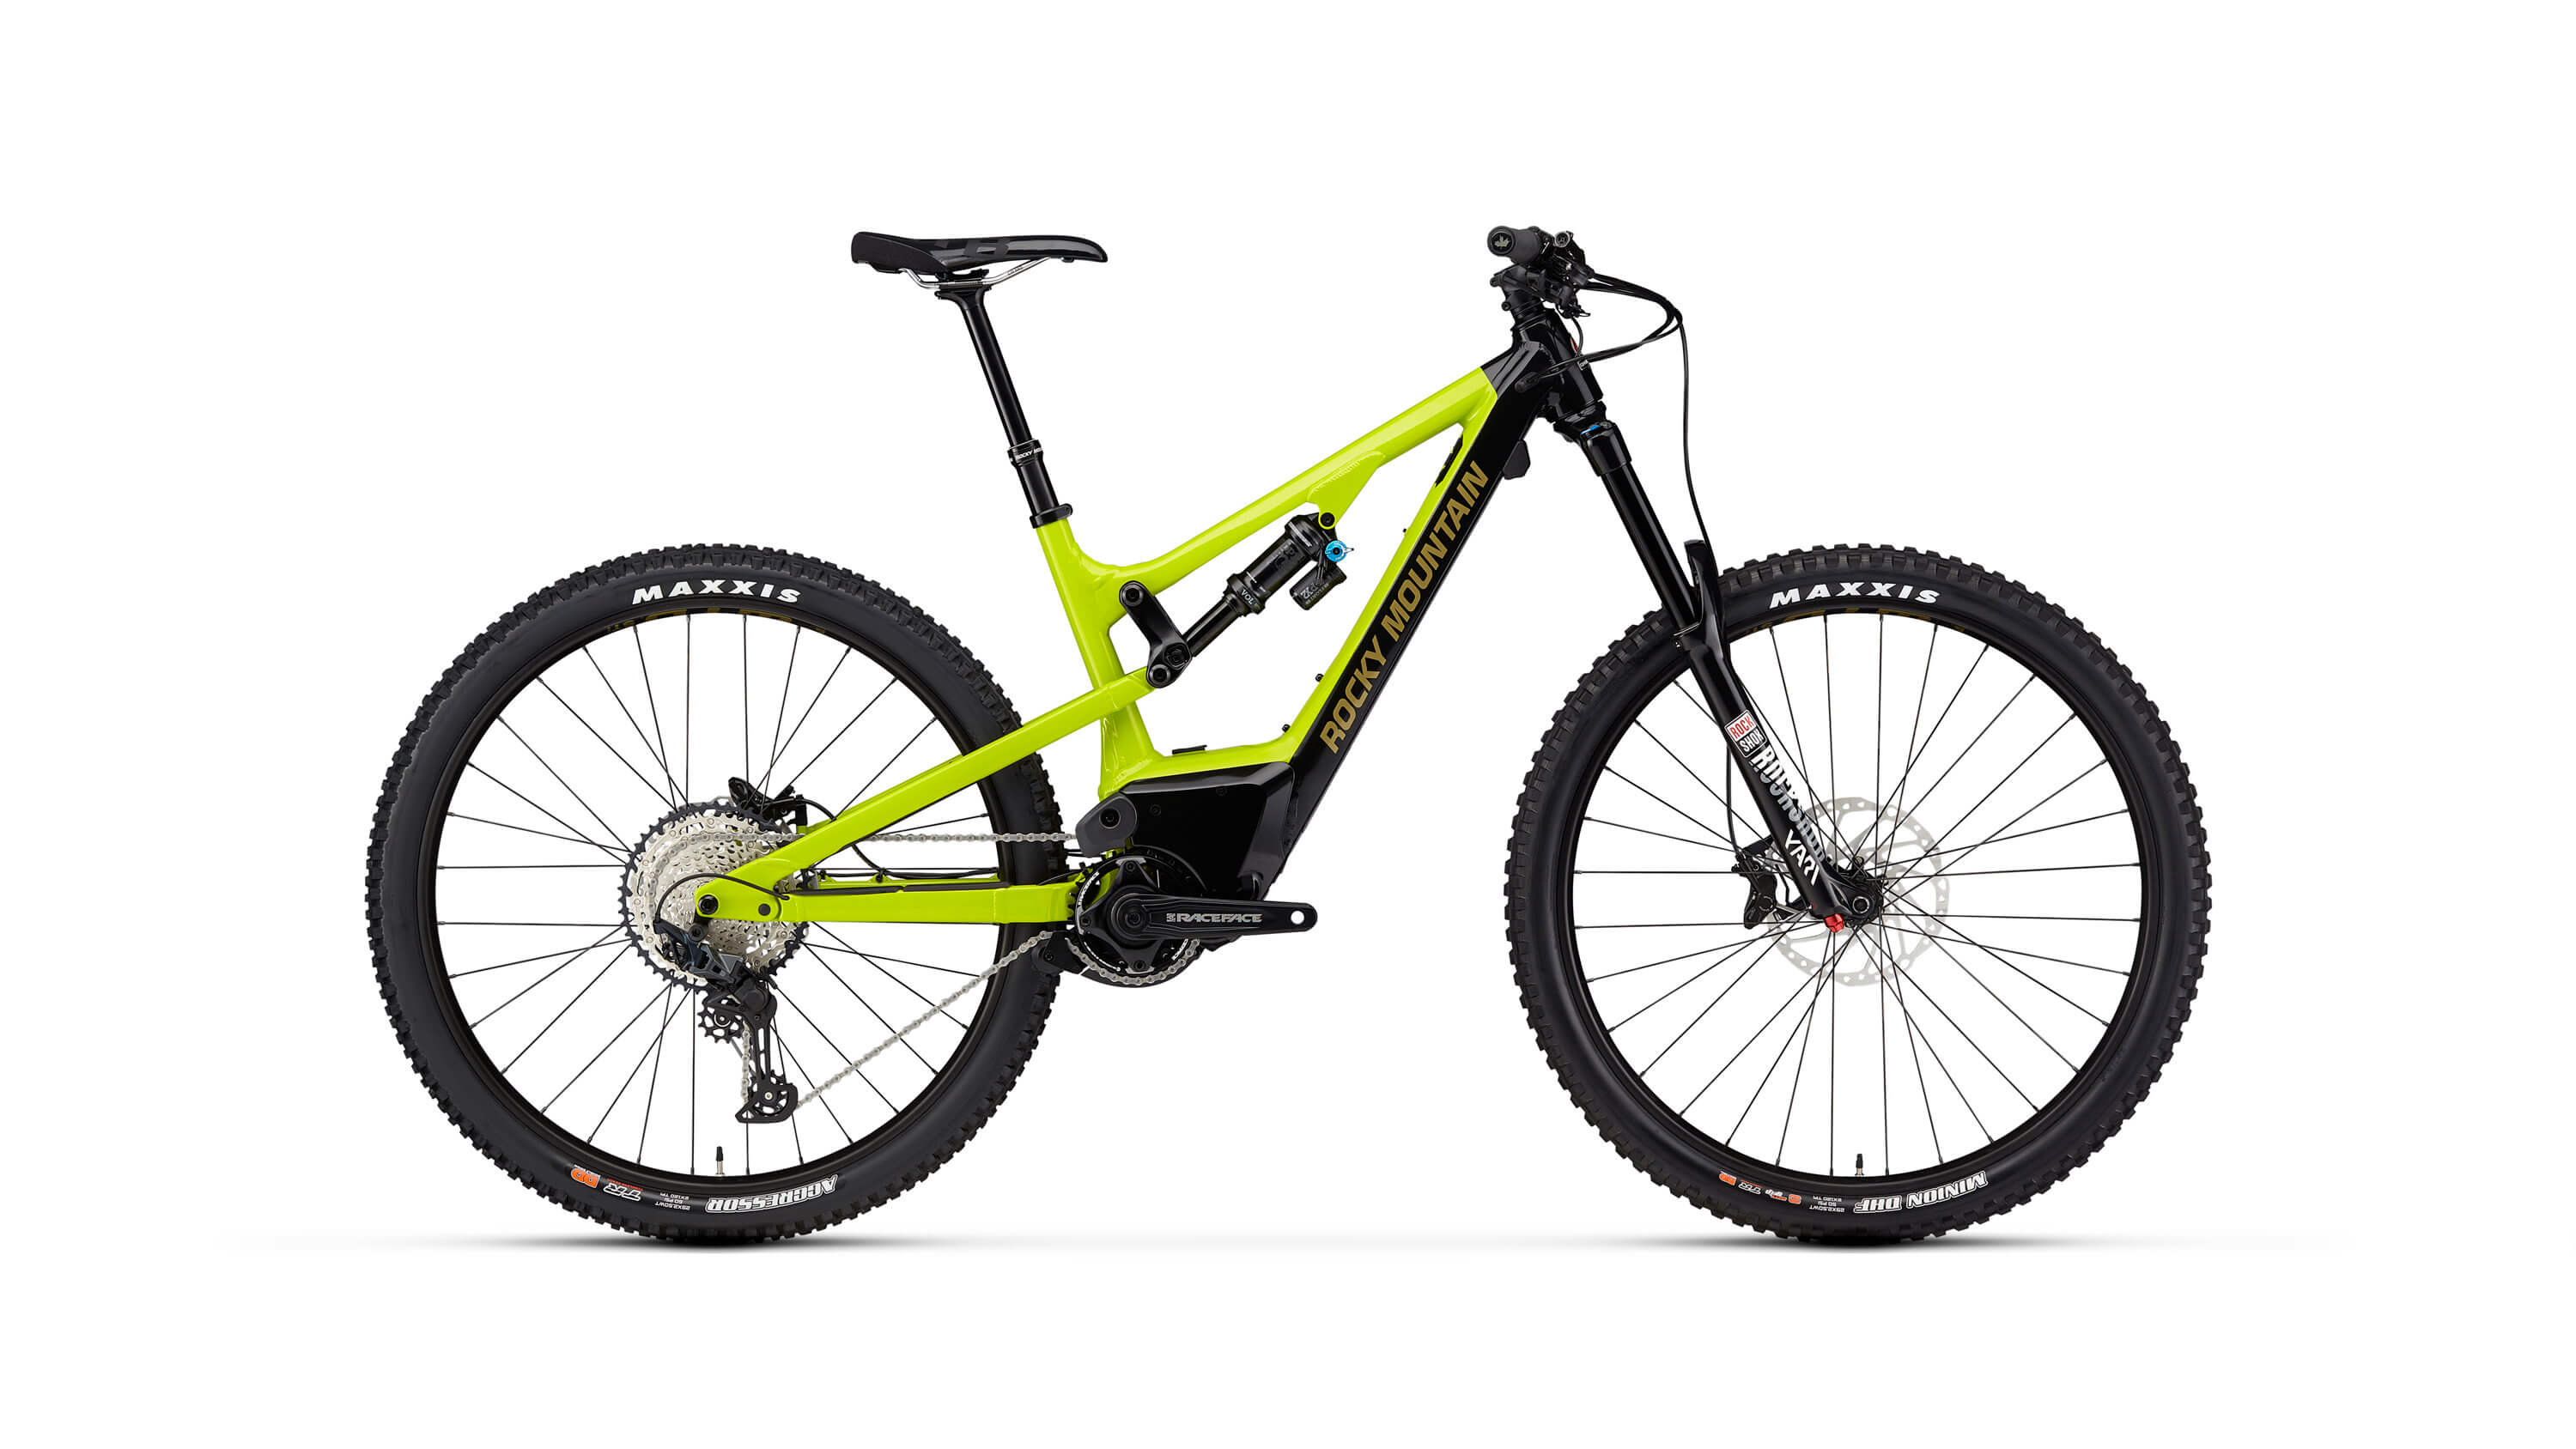
Not recommended for the Bike Park. E-mountain bikes are welcome on the chairlift to access the alpine cross country trails. We do not recommend e-bikes for downhill trails as they are usually intended for a cross-country style experience, however newer e-bikes designed as all-mountain bikes may be suitable for some of these trails. If you are already an experienced mountain biker and new to E-bikes, remember the motor helps with the climb but makes them heavier and handle differently to a regular bike. Start easy and work your way up to harder trails. Elevation Bike, Ski and Board rents enduro e-bikes (Instinct Powerplay BC Edition) that can be used on downhill trails.
As with all other bike types, riding uphill on any of the designated downhill trails in the Bike Park is strictly prohibited for safety reasons.
Don’t have the right type of bike for your needs? Elevation Bike, Ski, and Board is the go-to bike shop in the village and has a full fleet of rental bikes from Rocky Mountain Bicycles and Devinci available, covering all types of bikes mentioned above. The team at Elevation can give you more information about the bikes that are available for rent and help you decide which type of bike best suits your needs.
Having the right protective equipment will help you be more comfortable on your bike, as well as help reduce the risk of injury during a crash.
A helmet is mandatory for all riders in the Sun Peaks Bike Park and we strongly recommend using a full-face helmet to provide the maximum amount of protection. We encourage you to wear a helmet at all times while riding outside of the Bike Park too.
Along with a helmet, we strongly recommend the following additional protective equipment:
Wrap-around goggles designed specifically for mountain biking are the best choice to protect your eyes from dirt, mud, branches, and other obstacles you’ll encounter on the trails or in a crash. Sunglasses or other, similar eyewear can also be used. Whichever option you choose, some form of eye protection is highly recommended.
Knee and shin pads provide protection from cuts, scrapes, and any impact to these vulnerable parts of your body. Your knees and legs are the most likely thing to be injured if you fall off your bike, so knee pads can often make the difference between getting up from a crash pain free or a premature end to your day of riding.
Like your knees, elbows are also at greater risk of injury during a crash. Elbow pads are available to protect them.
Gloves help you keep your grip on the handlebar and brakes. Your hands are also typically first to support you in a crash, so gloves provide protection from cuts and scrapes. We recommend using mountain bike specific gloves for comfort and dexterity.
Shoes with a durable toe box and high ankle support are important to manage the rough terrain and impacts of mountain biking. Mountain bike specific shoes are recommended, however sturdy hiking or athletic footwear can also be used.
The less skin you have showing, the less likely you will suffer scrapes and cuts during a crash. We recommend long sleeves and longer style shorts for riding. Mountain bike specific clothing, such as jerseys and riding shorts, provide more durability and some additional protection in the event of a crash.
Body armour is optional, but recommended, as it provides extra protection from impacts to your back and chest during a crash.
Also optional, but recommended to provide extra neck support for anyone who is hitting high consequence features like large jumps and/or drops.
Protective equipment can be rented through Elevation Bike, Ski, and Board. Elevation also has a range of protective equipment, helmets, and apparel available for purchase.
The best way to start your mountain bike journey is by taking a lesson with one of the experienced bike coaches from the Sun Peaks Sports School. Learning the correct body positioning, braking technique, and bike handling skills right from the start will set you up for success on the trails. Lessons run daily and options are available for all ability levels, from first timers to mountain biking right up to advanced riders looking to hone their skills.
Explore the full range of lessons, guided tours, camps, and other programs offered by the Sun Peaks Sports School here.
We hope you enjoy your visit to the Sun Peaks Bike Park and we’ll see you on the trails!